BowMan wrote:Could you post a similar article as to how you go about making them. Do you make sure that they weigh in consistently to ensure every arrow follows a similar trajectory?
I am not making any at the moment but I will take a few pics and do a how to post whenever that happens.
The fletching method remains the same and gluing the tips on is more or less the same as gluing in an insert, except that the points are glued to the outer surface of the shaft.
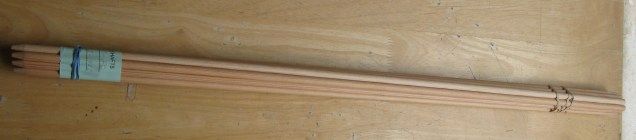
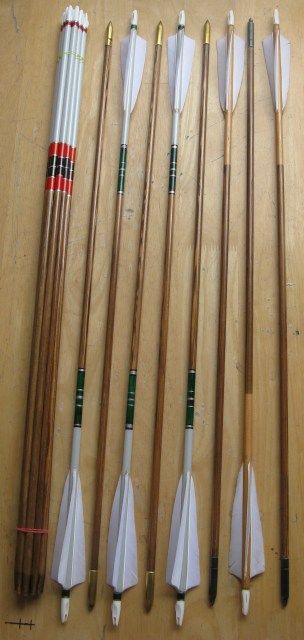
Where wooden arrows differ from fibreglass, aluminium and carbon arrows is the preparation of the shaft.
Your shafts will look like this when you get them. I have added the tapers after receiving them.
If necessary, cut the shaft to your required BOP length.
Sand them down lightly.
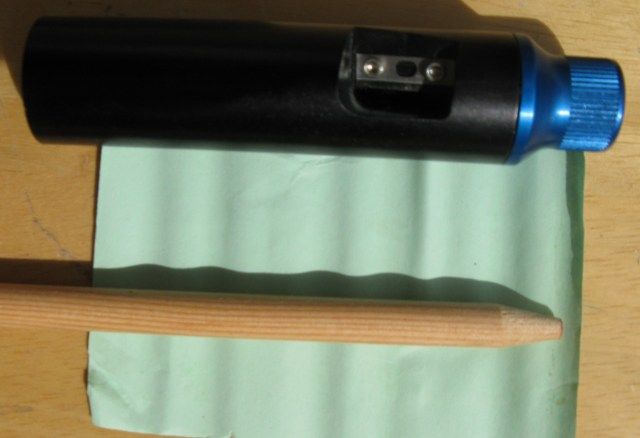
You then need to taper them using a tapering tool.
5* taper for the pile end...
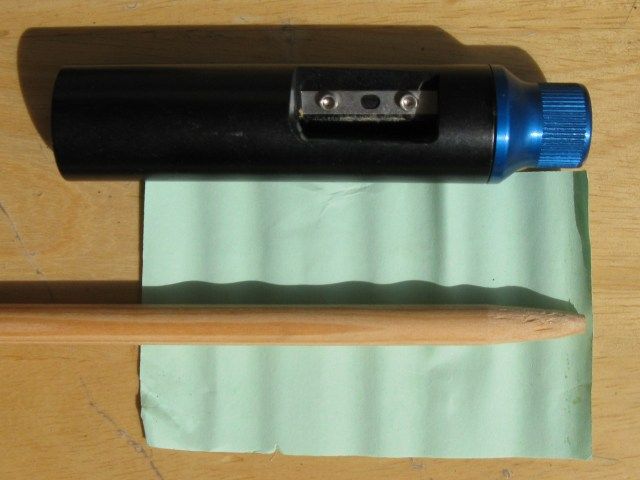
and 11* taper for the nock end.
Then you straighten your shaft. I use the shank of a screwdriver to rub at the high spots on the shaft until the bend is gone. You must check the shaft for straightness after each stage of work mentioned below.
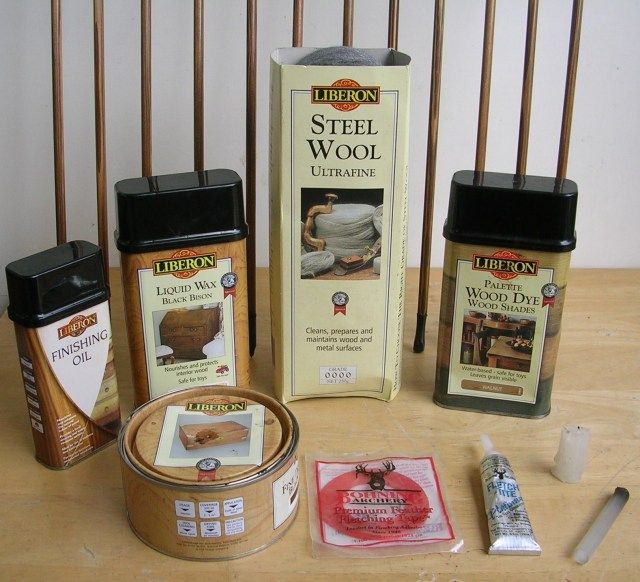
After this you can stain your shafts or leave them bare. I do not stain the portion that is going to form the crown of the shaft. Incidentally, an arrow need not be crowned. I use the same water based stains I use for gun stocks.
Then you need to seal the shaft. I use 3 coats of Birchwood Casey Tru Oil or equivalent. There are specifically made lacquer based sealers for arrow shafts if you want to use those. Depending on the crowning method, you may want to crown the shaft before sealing it.
Then you crown the shaft using spray paint, paint and dip tubes or arrow wraps. This step is not necessary to a make a good shaft. It's purely for looks and identification. Note that an arrow wrap will stiffen the shaft and can be used to spine the arrow to the bow.
Next glue on the the nock. Make sure the nock index is parallel to the grains seen on the shaft. If your nocks do not have an index, ensure that when the nock sits on the string, the string is perpendicular to the grains.
If you want to fart around some more, you can crest your shaft. Again not necessary. It's purely for looks and identification. There are specialised cresting lathes available and the crest is applied using paint and paint brushes of varying thickness as per your design. I merely use permanent markers and do it by hand.
You can then seal the cresting if you wish.
Apply fletch and points and you are ready to go.
Some of my wooden arrows and shaft finishing supplies:
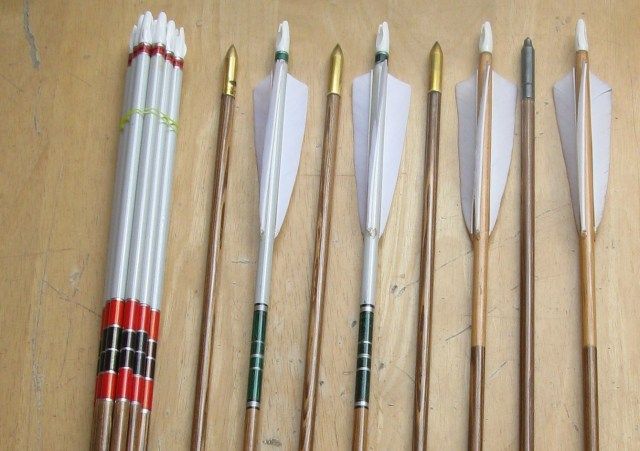
Regardless of the shaft material, shafts must be in the same spine and weight range for the intended bow. Neddless to say, the spine and weight has to suit the bow. I am using Douglas Fir shafts from Surewood Shafts. They weigh 676 grains all up and are in the 75-80# spine category even though my longbows only draw 60 and 65#@28". This is because my points weigh 225 grains which weaken the shaft considerably.
I will do a detailed post when I do my next dozen but I hope the above helps for now.